
Need an Ionic tutorial to develop an app?
With Ionic you can write code efficiently and quickly with 1x and develop for Android, iOS and Windows Phone.
Ready for your first app?
Let’s get started!
Ionic Tutorial – Here’s what you’ll develop today
We’ll build a “friendly” Ionic app that greets you with your favourite greeting.
You should have programmed something before, e.g. Java, Python or any other language. If not, you can go to the learn to code tutorial beforehand. Knowledge of HTML and / or CSS is advantageous.
Prepare the computer
To get started, Node.js and an editor are sufficient.
You need Android Studio or Xcode if you want to build apps for your devices
Node Package Management: node.js to install Ionic
Any code editor / Windows editor. I love Visual Studio Code as there are extensions for the editor.
(Optional if you want to install the app on your Android device) install the Java JDK which provides the development environment for Android Studio to build an Android app. Install Android Studio or the Android SDK to upload an Android app to the Google Play Store.
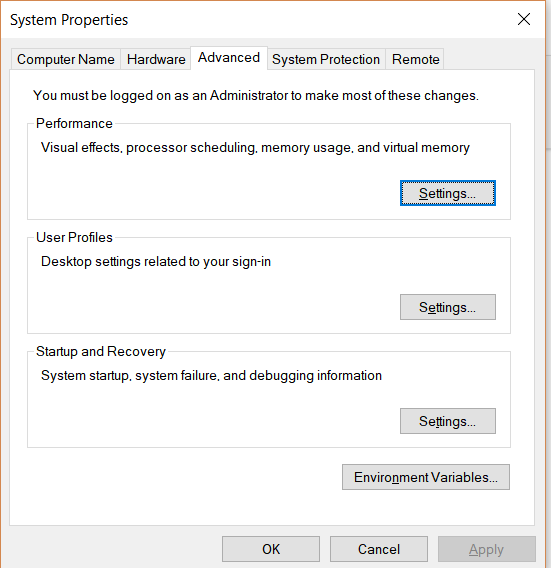
Create the environment variables for Java, Gradle and Android Studio to trigger a working build process.
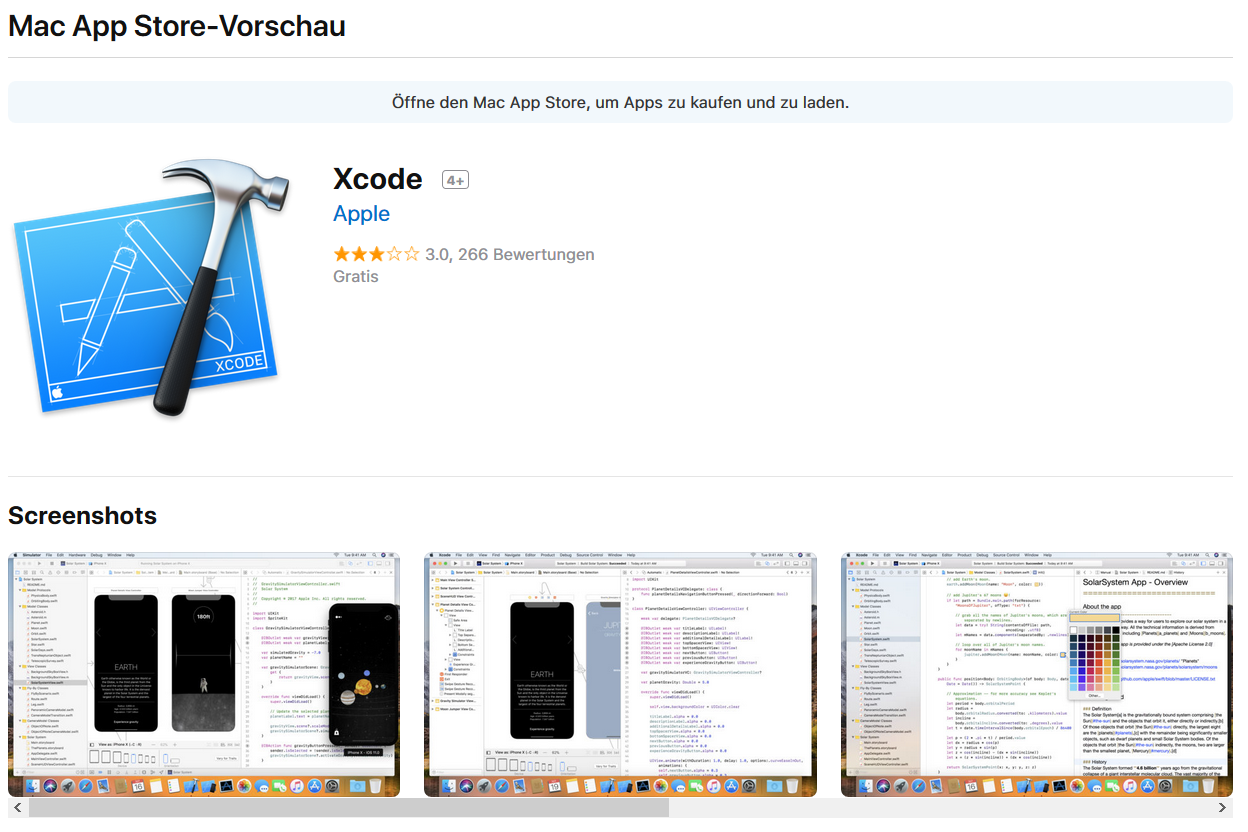
(Optional if you want to install the app on your Apple device) Install Xcode to install an iOS app on your device.
Ionic Basics – HTML, CSS, Angular
We write the Ionic app with HTML, CSS and Angular as TypeScript to create a universal Ionic app
This sounds a lot at first – we need to look at a few concepts.
What is Ionic framework and hybrid apps?
You take some HTML, CSS and Angular and code. You build an Ionic app that runs in the Apache Cordova container on the three most popular platforms IOS, Android and Windows Phone.
Drifty developed Ionic, for which the company received $1 million in seed funding from Arthur Ventures in March 2014. The developers released the first alpha version of ionc at the end of November 2013.
Ionic is considered a hybrid app framework that allows you to build stable and performant apps in a very short time. Ionic runs on your smartphone in a kind of browser that can access the sensors of the phone with Ionic Native:
- Camera
- Speed sensor
- Push notification
- Compass
- …
This makes Ionic an extremely extensible and useful framework.
Folder and orientation in the Ionic project
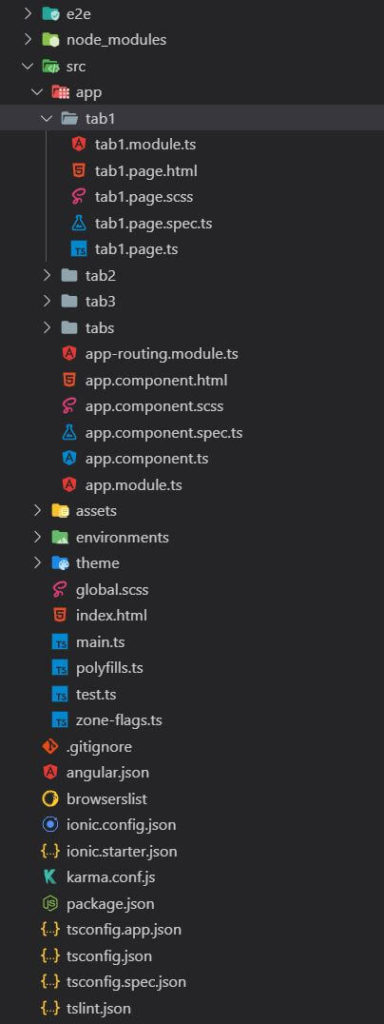
How to find your way around the Ionic structure
- src/app- most important place for programming. This is where all the views of the app are stored
- nodes_modules – the background libraries of JavaScript
- assets – for all images, audio and co that should be included in your app
- Pipes / Providers / Themes – your own “extensions
Most important file types in the Ionic project
- .ts – TypeScript file – with this the page runs dynamically and takes action
- .html – the design template – structure and layout of the page
- .scss is a style sheet file in which you can make design adjustments as with normal web pages
Important, special files
- app.module.ts – integration of the modules of the whole project e.g. camera function – new views
- app-routing.module.ts specifies the URL in the browser
- app.component.scss, global.scss and theme/variable.scss are global stylesheet files that you modify to change the appearance of the project
- variables.scss – define the colours, themes and designs to apply across the app
- tab1.page.html – the first view when you open the app
- json – data protection structure
How does Ionic work?
You’ll learn about the foundations Ionic is built on and how it uses the different languages.
HTML – The structure of your app
The HTML file defines the structure of your app and refers to the TypeScript code (button link) for an action element. Many custom Ionic tags start with the prefix <ion-.
Ionic can create the essential control elements for you according to a modular principle. You do not need to create a button for iOS and Android. Ionic generates the desired styled end product for you when you build it.
You can insert Angular code at any point in the HTML file.
If you write {{example}} in the HTML file, you can define the variable in TypeScript with example:string = "Hallo Welt";
The browser gives you Hello World.
Call methods inside the double curly brackets {{sayHello()}}, which you have defined in the appropriate TypeScript file. sayHello() returns a string with the return and Angular writes the string to the place in the HTML file.
sayHello(){
 return "Hello";
 }
You can use other HTML tags in the file and style them with CSS. Use the corresponding.scss file to design the page with CSS. This is for clarity. With identifiers (#header) and classes (.buttons) you can connect to the.scss file.
TypeScript – What should your app do?
With TypeScript, a further development of JavaScript by Microsoft, we create the technical concept, the logical structure of our app, which brings buttons to life. If you know JavaScript, you have a clear advantage here, because JavaScript is valid TypeScript code.
Let’s begin: Basics. Warm-up
- Simple JavaScript output after loading the app in
ionViewDidLoad()
 ionViewDidLoad() {
    console.log('ionViewDidLoad DetailPage');
}- if-statement for the money type
  getCurrencySymbol(currency) {
    if (currency == "EUR") {
      return "€";
    } else {
      return "$";
    }
}- Typical constructor that embeds modules and takes parameters
  constructor(
    public navCtrl: NavController,
    public navParams: NavParams,
    private http: HttpClient,
  ) {
    this.expenseNumber = this.navParams.get("expenseNumber");
}- a function to make a new view “pop up”
 openEditPage() {
    this.navCtrl.push(EditPage);
 }
TypeScript can load data sets into the app in the form of JSON.
Providers load JSON files into the app via a relative or absolute link. An HTTP POST request sends data to the server, while a GET request retrieves the data.
Coding: Now it’s getting serious.
I hope you were able to install npm and ionic to have a quick and good start with Ionic.
Now let’s write the first code lines for Ionic together.
(If not, write in the comments your installation problems)
Set up an Ionic project
- Install Ionic with the node.js package manager globally over your system via the Windows terminal with admin commands
npm install -g ionic cordova - Navigate with
cdto the folder you want to set up the project incd OrdnerName - Create a new project with
ionic start myFirstApp tabs --type=angular - When you get the message
"Would you like to integrate your new app with Cordova to target native iOS and Android?"
Selecty - Setting up an Ionic project takes a moment (1-10 minutes depending on Internet and PC)

When the message"Install the free Ionic Pro SDK and connect your app?"
appears Select n
Navigate to the new project folder withcd myFirstApp
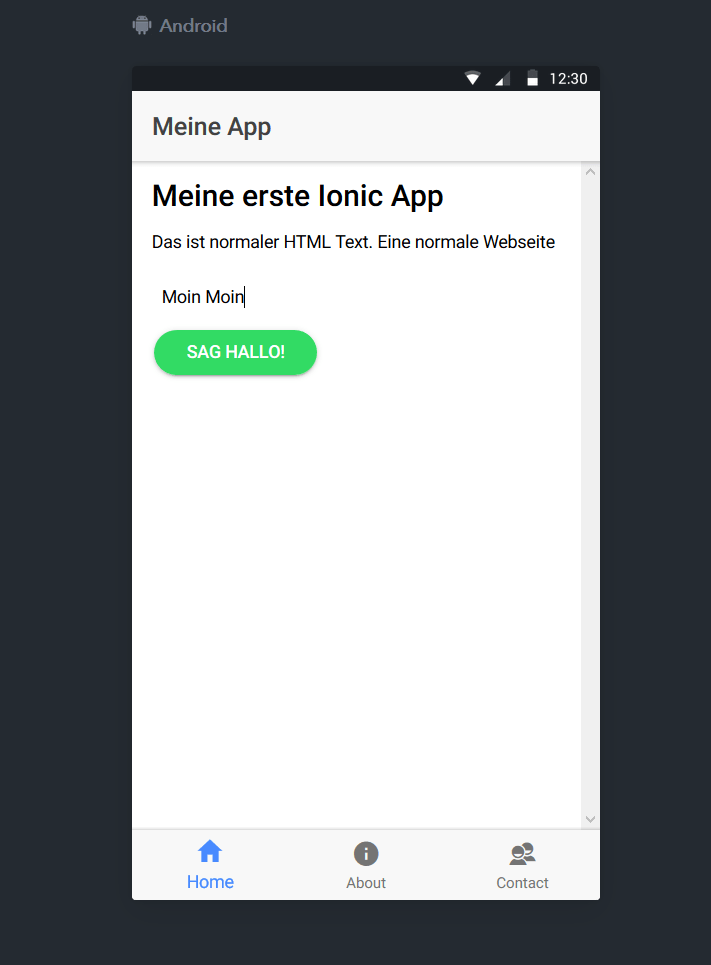
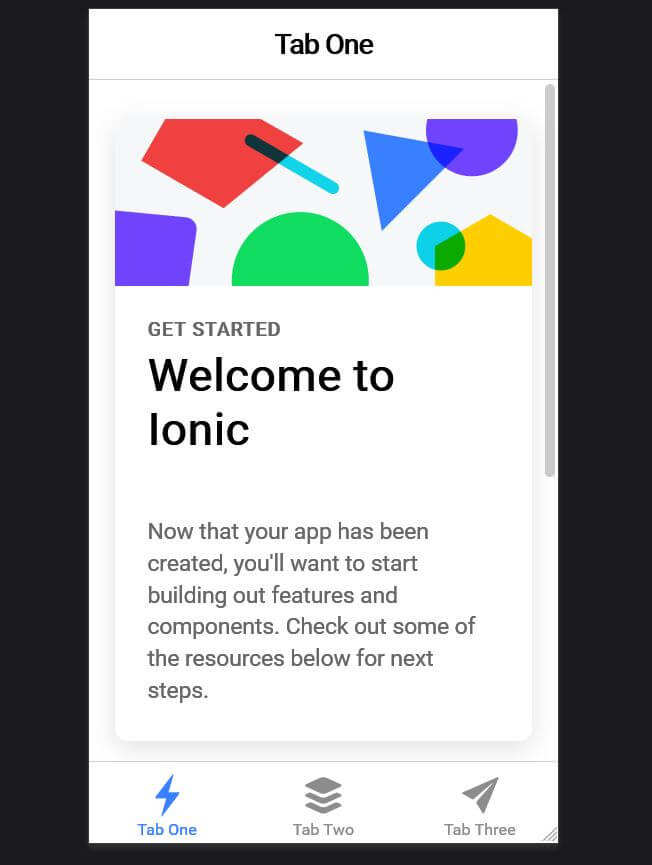
Let’s have a look at the result and start the blank Ionic app in your browser (Vivaldi, Firefox, Chrome are optimal).ionic serve
Press F12 and switch to mobile mode.
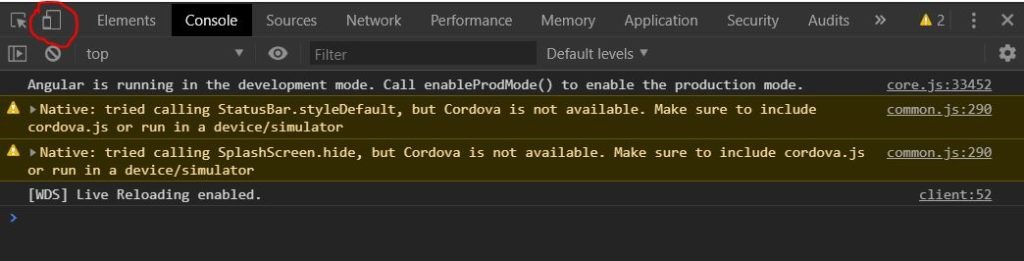
For developing, ionic serve is usually better because it is faster and more usable with Chrome’s Developer Tools.
ionic serve
If you did everything right, it looks like the picture above.
Programming the hybrid app with Ionic
If you had any problems setting it up, please post it in the comments below. I will respond to your question as soon as possible.
When the project is successfully set up, open the file tab1.page.html and clean it up so we can work with:
import { Component } from '@angular/core';
import { Router } from '@angular/router';
@Component({
selector: 'app-tab1',
templateUrl: 'tab1.page.html',
styleUrls: ['tab1.page.scss']
})
export class Tab1Page {
name: String;
constructor(public router: Router) { }
openNextTab() {
this.router.navigate(['tabs/tab2', { name: this.name }])
}
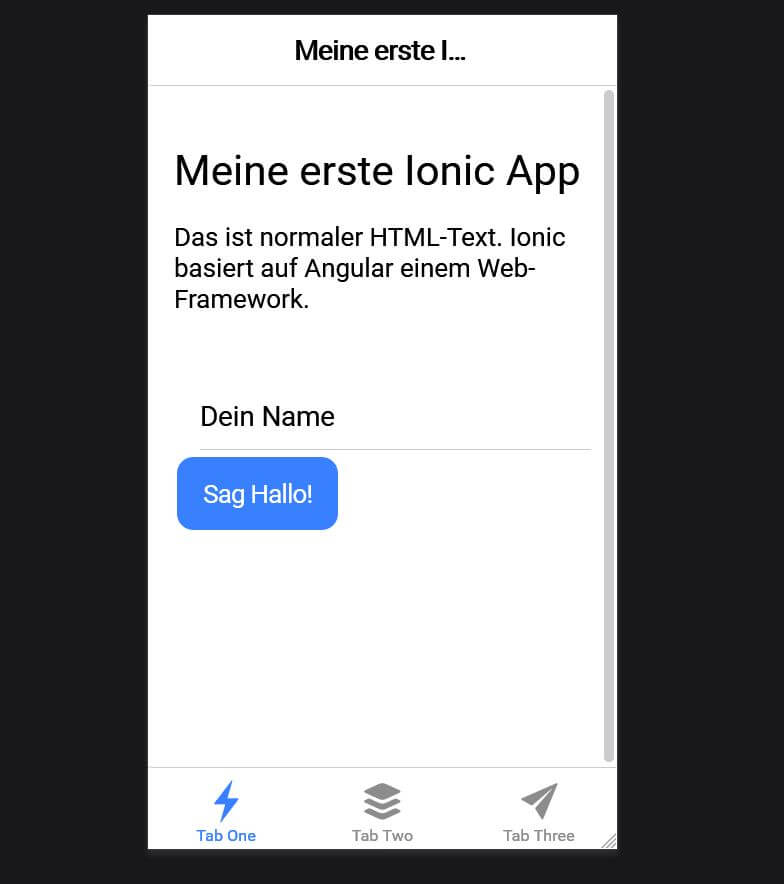
}Now we create a button and a text field to enter text and a recognisable title. The button is rounded with the attribute round and the button colour is defined by the secondary colour color="secondary".
With the ngModel we save the input from the greeting into the variable greeting, which we defined earlier in the TypeScript file.
tab1.page.ts – Reference with Angular Route
import { Component } from '@angular/core';
import { Router, ActivatedRoute } from '@angular/router';

@Component({
  selector: 'app-tab2',
  templateUrl: 'tab2.page.html',
  styleUrls: ['tab2.page.scss']
})
export class Tab2Page {

  name;

  constructor(private router: ActivatedRoute) {

    this.name = this.router.snapshot.paramMap.get('name');
  }
}
In the next step, we edit the second tab, where the button should forward your name and display it there.
For this we need an Angular Route. An Angular Route works like a URL. You refer to the tab tabs/tab2 with the navigate function and add the name as a parameter. On the other side, the tabs2.page.ts takes the parameter and outputs it.
tab2.page.ts – Output of the name
import { Component } from '@angular/core';
import { Router, ActivatedRoute } from '@angular/router';

@Component({
  selector: 'app-tab2',
  templateUrl: 'tab2.page.html',
  styleUrls: ['tab2.page.scss']
})
export class Tab2Page {

  name;

  constructor(private router: ActivatedRoute) {

    this.name = this.router.snapshot.paramMap.get('name');
  }

}
The output in tab2.page.html via an Angular mark the curly brackets{{}}. A little more CSS and the app welcomes you.
tab2.page.html
<ion-header>
<ion-toolbar>
<ion-title>
Tab Two
</ion-title>
</ion-toolbar>
</ion-header>
<ion-content padding>
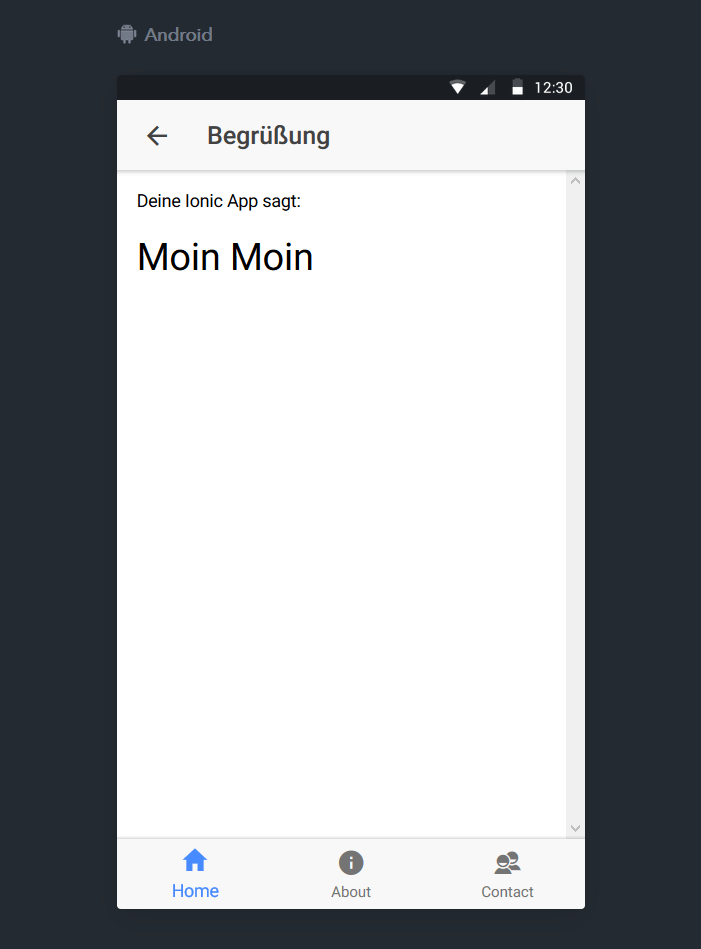
<h1>Guten Tag, {{name}}!</h1>
</ion-content>The result: Your Ionic app is “friendly”
And this is what the result looks like:
Finished App Page 1
Extensions: How can I extend the app?
Haven’t you had enough of the Ionic Tutorial?
Or do you want to learn more about Ionic?
Then I’ll show you in this section how you can extend your app and your knowledge.
Most important terminal commands for the Ionic framework
The live reload makes developing much easier, because you don’t always have to restart.
If you ionic serve and edit the file at the same time, the Ionic page is completely reloaded in the browser when you save the file.
This saves a lot of time.
Here are some more interesting commands you could use when programming with Ionic.
ionic serve  // start the browser view
ionic lab // start the emulated browser view
ionic gerneate page newPage // make a new page
ionig gnerate provider getMyData // new way to import data
Please comment!
You have made it. Your first Ionic app is ready. After all the installations and lines of code, you can take a break.
To make this tutorial even better, please comment below or share it with your friends.
- Write about errors that occur …
- Text passages that were described unclearly
- Criticism with suggestions for improvement…
- Suggestions for new posts …
- Installation problems …
- Your enhancements to the 1st Ionic app …
Thank you. I look forward to your feedback


